Making DIY Curtains
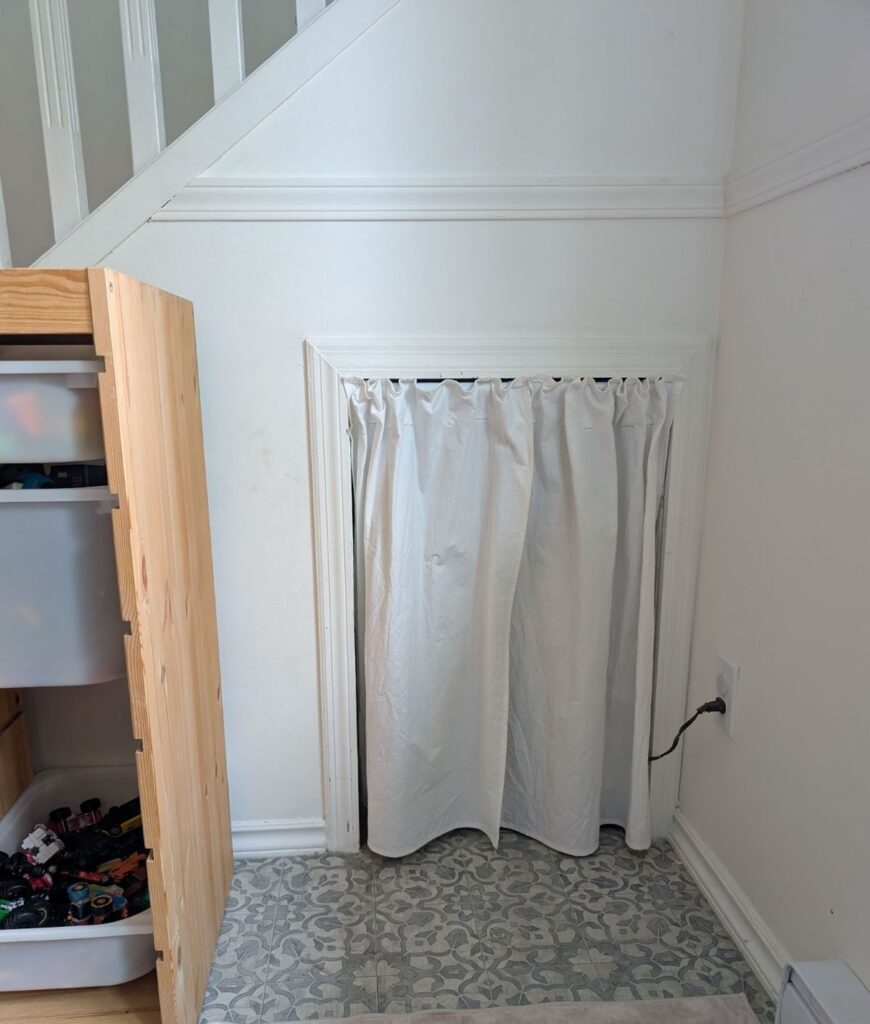
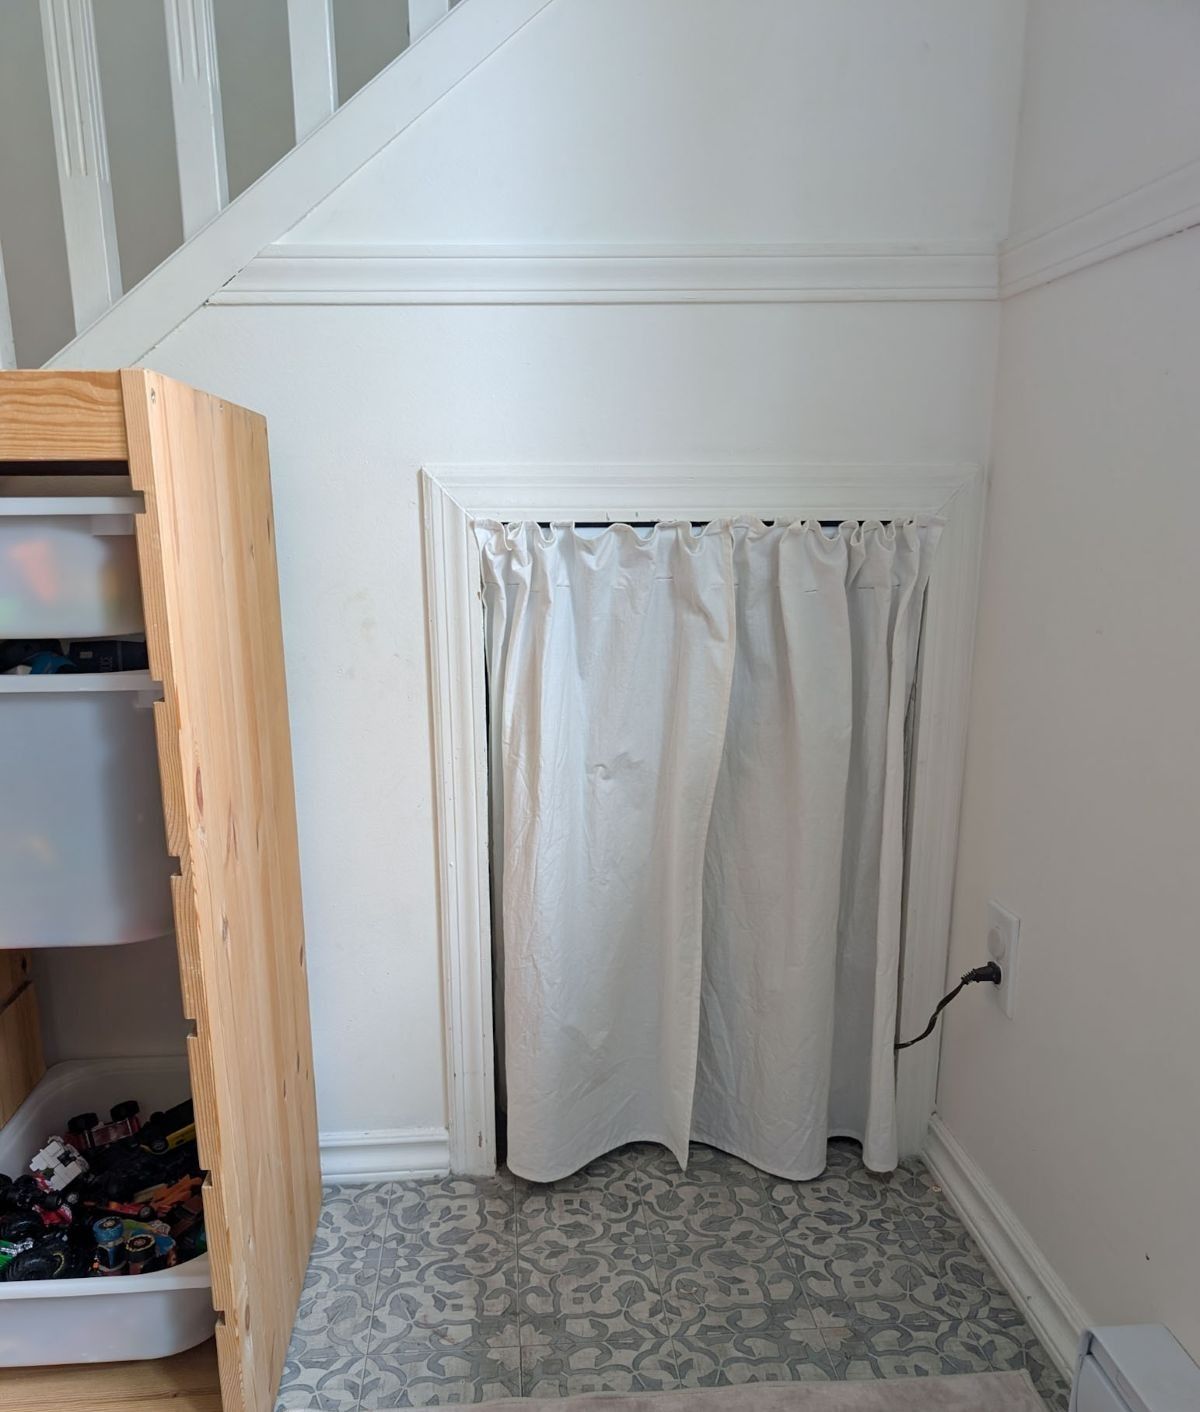
Usually my sewing projects consist of clothes for myself or the kids. Recently, I put my sewing skills to use making some diy curtains for our home. One space we love is the little under-the-stairs nook that our kids call the secret room. It’s a fitting name because you wouldn’t really notice it if you didn’t know to look for it. The door to get into it is cut right out of the wall and is only a few feet high.
The previous owners had finished and painted some of the walls inside and had also added a custom table . We pictured our kids coloring, building Lego, and playing imaginary games in their secret room. It seemed like the type of place any kid would love to have in their home. A little space all their own.
Fast-forward a few months and that little room hasn’t gotten as much use as we had expected. There are times when they’ll play in there, hauling in their pillows and blankets and laying them on the floor to “sleep”. Or the occasional time my daughter will color in there. But, for the majority of the day, it remains mostly unused.
We wondered about taking out the custom table and turning it into more of a reading space. But we were hesitant to take out the table because it fits the space so well.
So we decided to try something else first. Taking off the door and replacing it with diy curtains.
We thought that maybe the separation was why they didn’t enjoy being in there as much. They all like to play around each other and me, so maybe if there wasn’t a door they would use the space more. It would be more like an extension of the playroom instead of it’s own separate space.
We got these tension rods from Amazon to hang the curtains on. There would be one in the secret room entrance and another just inside to block of the part where we stored bulk goods like potatoes, onions, and wheat berries. We didn’t want to spend time screwing in more permanent curtain rods in case the whole curtain thing didn’t work out. That way we could just take the curtain down and put the door back, no harm no foul.
I had a cotton canvas sheet sitting in my fabric stash that was just the thing for this project. Earlier I had tried making a diy curtain for our laundry room. While it looked nice and did the job, there were a few things about it I didn’t love. I had made it out of a thrifted bedsheet which made it very light and flowy. Something with a little more structure would have worked better. I knew the cotton canvas was just the thing to avoid the same issue with this curtain. It was a plain white too which would match the walls and keep it from standing out.
getting measurements and prepping fabric
The first thing to do was to figure out the measurements so I could cut out the curtain. I wanted to make two panels so you could part the curtain. I also wanted it to have some nice gathers so it didn’t look like someone just threw a sheet over the entrance. To get that gathered look I chose to make each panel the same width as the doorway, adding an extra 2″ for hemming the sides. Having twice the amount of fabric as the doorway would force the curtain to gather, achieving the look I was going for. For the length I did the same length as the doorway plus 2″ again for hemming (I’ll explain more about that later).
Before marking out the measurements on my fabric I gave it a good iron to smooth out any wrinkles and make sure my measurements would be accurate. Then I marked out the measurements I needed using a water erasable pen and a straight edge ruler. Once it was all marked out I grabbed my fabric scissors and cut out the panels.
sewing the curtain body
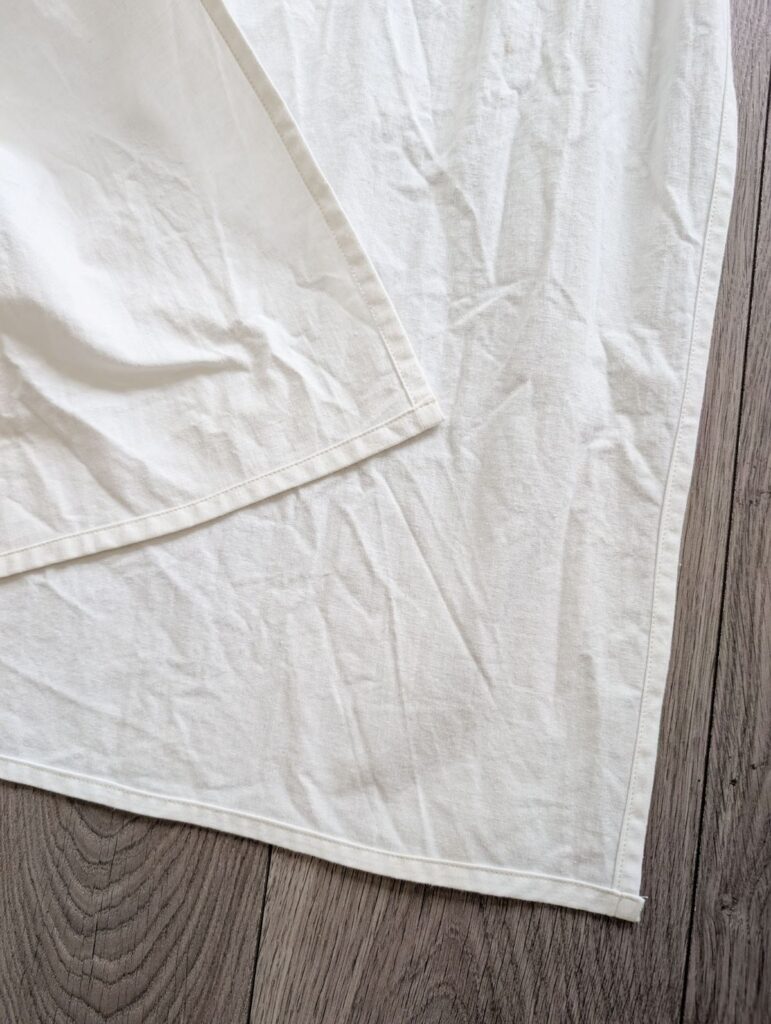
For each curtain panel, I pressed the sides in 1cm then folded and pressed another 1cm to encase all the raw edges of the fabric. I stitched the hemmed sides in place and then repeated the same process for the top and bottom of each panel. I gave it all another good press and then I had both panels ready. Super easy! The only thing left to do was to make the back tabs to be able to hang the curtain.
Sewing the Curtain Back Tabs
I had a long strip of white cotton fabric from another project that was the perfect width for the tabs. I started with six but ended up making eight so the curtain would hang better.
This part was a bit trickier than making the curtain body. I folded the tops and bottoms of each strip down about 3/4 cm and pressed them. Then I folded the longer sides in by 1 cm and pressed them. When folded in half, all the raw edges were encased inside. I stitched the top, bottoms, and the long edge together and ended up with a neat little strip that would become my tab.
Doing eight of these was a little tedious and I found my fabric kept wanted to feed into my sewing machine instead of going straight. But once they were all done all that was left was pressing them and stitching them to the curtain.
Putting It All Together
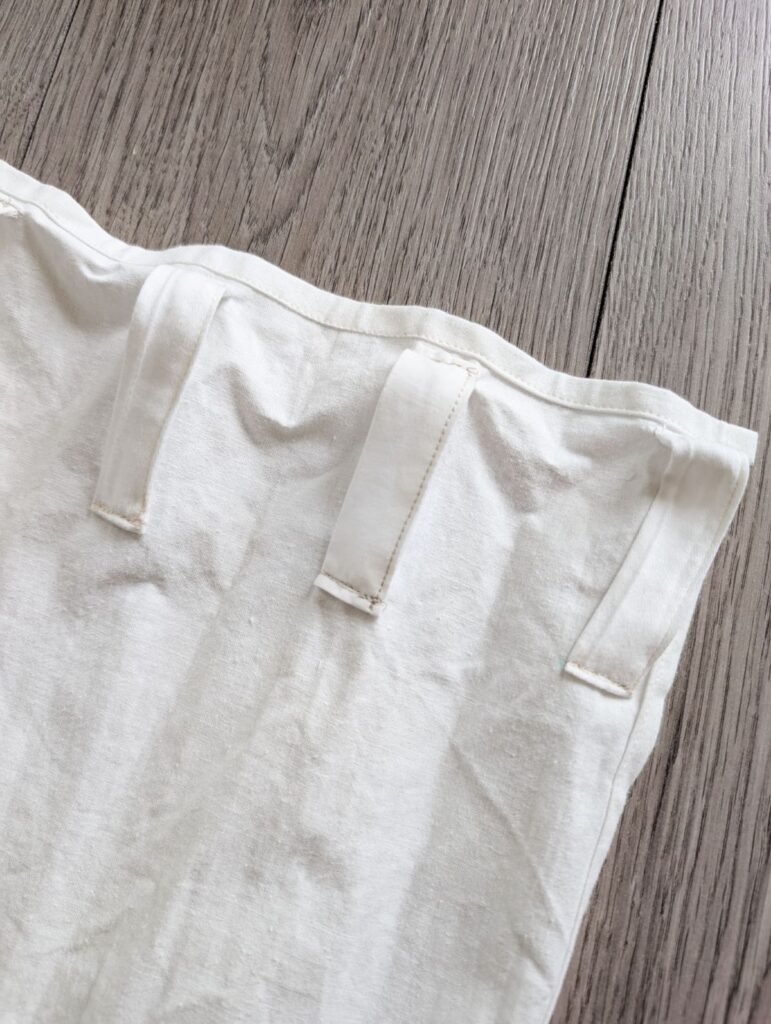
Figuring out how far apart to put the tabs took a little math work to get right. I had eight tabs, four per panel, and I needed one on each end so it wouldn’t sag. To start, I measured the space between the tabs at each end and divided it by 3 to figure out where the last two should go (I know that seems a little confusing dividing it by 3 instead of 2 but I had three gaps between the four tabs, that’s why). I marked the measurements onto the panels about 1/2 cm from the hem at the top of the curtain and pinned the tabs in place. I stitched them onto the curtain and pressed them. So close to being done now!
I wanted to stitch the tabs on with space to slip the curtain rod between so instead of sewing them flat to the curtain, I moved them up about 1 cm before pinning and stitching them in place. I gave the tabs a good press where I had stitched and the curtains were done and ready to be hung up.
The Final Result
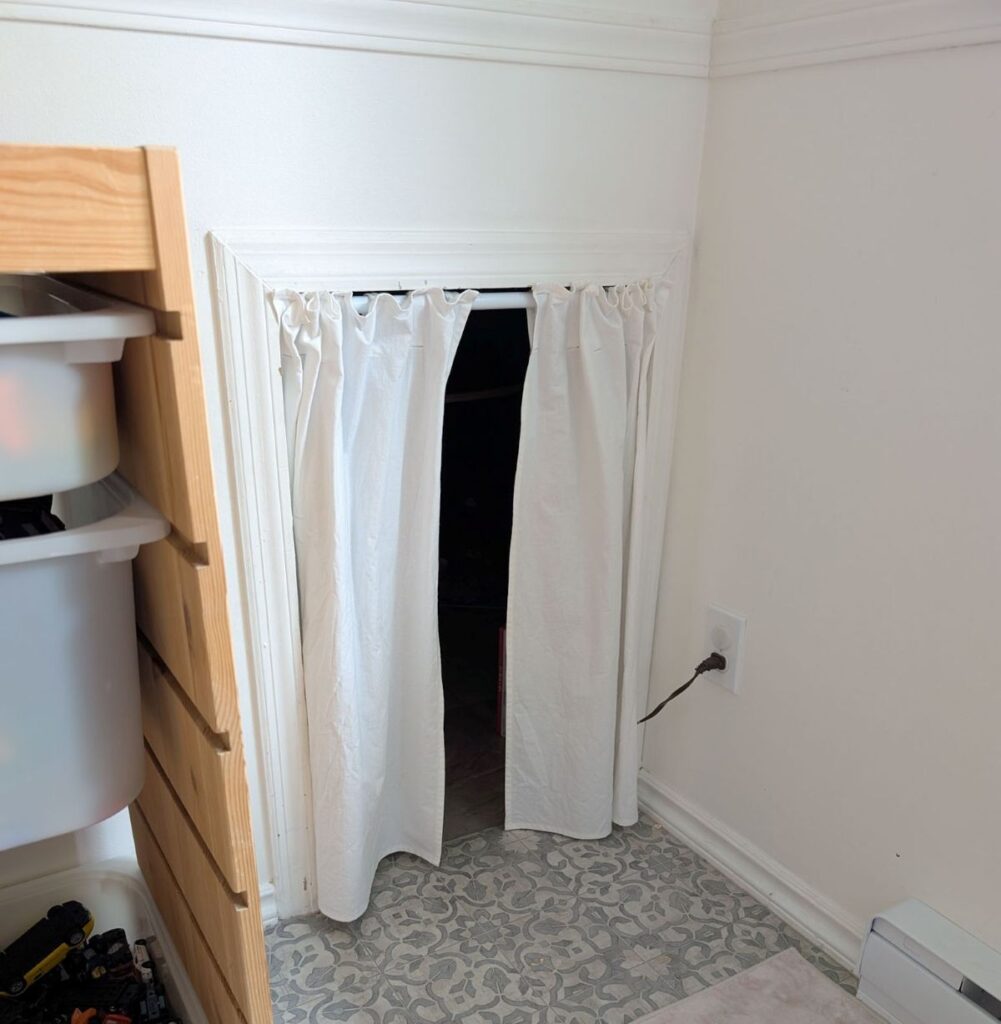
Seeing my projects come together and completed exactly as I had envisioned is one of my favorite parts of sewing. These curtains came together quickly and look so cute in this space. And they seem to be helping with the issue we were having. Our daughter spends much more time in there now. If we find she’s disappeared, she’s usually hanging out in there.
Want to Give Making Your Own Curtains a Go?
If making curtains yourself this way is something you’d like to try, I’ve written out clear instructions for all the steps I took to make these for my home. You can follow them to the letter or tweak them to make the perfect curtains for your space.
Supplies
- cotton canvas (you could also use a heavier linen, or if you want a more flowy curtain you could use a lightweight cotton or linen)
- measuring tape
- water erasable pen or tailor’s chalk
- fabric scissors
- iron
- pins
- sewing machine
- thread to match your fabric
- curtain rod (or tension rod)
Instructions
Making the Curtain
- Measure your window / doorway length and width and mark measurements down on a piece of paper.
- Double the width measurement and add 4cm to both the length and width for hemming (2cm for the top, 2cm for the bottom, and 2cm for each side). Doubling the measurement will give you that lovely gathered look when they’re fully closed. You can do less if you want a less gathered look, up to you!
- Mark and cut out your fabric (for the best result, give it a quick iron to get out any wrinkles).
- Hem the top, bottom, and sides of each rectangle of fabric. To do this, fold the raw edge in 1cm and press with your iron. Fold another 1cm and press. Stitch in place and give it a final press. I recommend doing the sides first and then the top and bottom for a neat finish.
Making the tabs
- For the tabs you’ll need some strips of fabric. How long and wide they are and how many you need really depends on how thick and long your curtain rod is and how wide you want your strips to be. For my curtains I cut 8 strips that were 4cm wide and approximately 2″ long.
- Fold the short ends of the tabs in by 3/4cm and press. Then fold the long ends in by 1cm and press.
- Fold the strips in half, enclosing all the raw edges, and press. Stitch along the folded edge and press.
Putting it all together
- Mark your tab placement starting with one at each end of the curtain. I put mine 1/2 below the hem, you could put your tabs lower or higher depending on how much fabric you want past your curtain rod. The lower you put them the more fabric will stick up past the curtain rod.
- Measure the distance between the end tabs and divide it by the number of tabs you have remaining minus 1. Basically, your measuring how much space to leave between each tab. If you have 4 tabs total, like I did, you’ll end up with three gaps between the tabs at each end.
- Mark your result onto your fabric with a water erasable pen or some tailor’s chalk.
- Pin your tabs onto your curtain where you put your marks and sew the tops of the tabs in place.
- Grab your curtain rod and lay it on top of your curtain and under the sewn tabs. Pin the bottoms of the tabs in place over the curtain rod and mark where they sit on your curtain. This is to make sure the front of the curtain lays flat and doesn’t pucker once the rod is inserted.
- Remove the rod and pin and stitch the bottoms of the tabs where you marked on your curtain.
- Give the tabs a good press with your iron and remove any visible marks left on the curtain.
That’s it! Your beautiful curtain is ready to be put up for you to enjoy.
Best of luck on your sewing journey!